Faux Stained Glass Tutorials for Medieval Studies
Stained glass is made through a careful process of adding metallic salts to color glass. Pieces of the colored glass are then cut into small shapes and assembled into pictures or designs, and usually connected using strips of lead. Rose window is a general term applied to round decorative windows, with a design that resembles the petals of a rose. Rose windows are characteristic of Gothic architecture, and can be found in most Gothic cathedrals in Northern France.
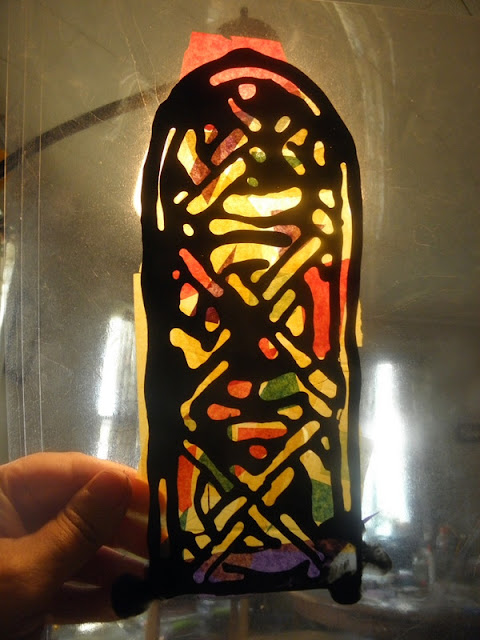
This stained glass project was done by my 13-year old with everyday materials you probably already have around you house.
These were done by my younger boys with a similar, but safer, technique.
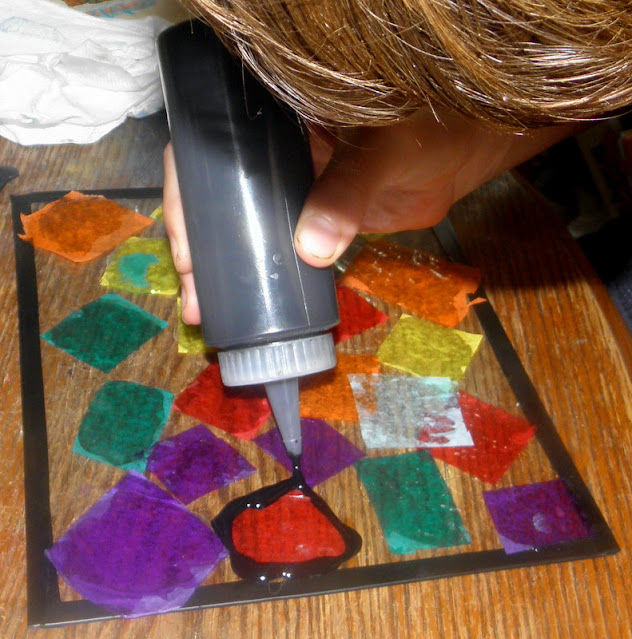
First you need the "leading." You can buy some called "Liquid Leading" by Gallery Glass at a craft store, but you can also mix up some of your own by using 3 parts white Elmer's glue to 1 part black liquid tempera paint. I put mine in a squirt bottle with a cap I found at Walmart in the candy making section. This homemade leading is thinner than the kind you buy at the craft store, but it a little easier for the little ones to work with.
Get a package of Pocket Laminating Sheets. Slip whatever design you want to trace under the clear plastic sheet (don't tear off the sheet protecting the sticky stuff yet) or make up a design as you go along.
At this point you will have something that looks a little like this. Notice we still have the model we are tracing under it. It can be taken out at this point. Put your laminating sheet with your wet leading somewhere safe to dry overnight.
Once it is dry, open the sheet up and lay it so the leading side is down on your table. Place small pieces of tissue paper on the other side, which is now open to you. The papers will move when you place the sticky sheet over the tissue paper, partly due to static electricity, so don't bother to try to place them precisely. In fact when you are all finished with the little pieces, you can cover it all over with larger pieces of light colored tissue paper so that there won't be any open spaces when it is finished. Now take the paper off the sticky side and carefully place it over your tissue paper. If your children are young, you might want to do this step for them because it is a bit difficult to prevent bubbles in the laminating sheet.
See how beautiful it is when you hold it up to the light. Now you can cut around the edges, if you desire, to have a sheet that is only your "stained glass."
For older students you can give them a piece of glass or Plexiglas for them to work with. We used an old pane from a picture frame we were no longer using. The first thing you need to do is tape the edges to make the glass safe. I used black electrical tape because it looks more like stained glass leading and matches the homemade "liquid leading" we'll be using. You could also buy a piece from Lowes or the like. Using Mod-Podge, have them glue pieces of tissue paper to the glass by painting some on the glass, putting down the tissue paper and then painting down some more Mod-Podge on top. You don't have to fill up all the spaces-you can leave some blank. Leave this to dry overnight.
Once it is dry, use the same glue-paint mixture as above to outline the tissue paper pieces.
The 'liquid leading" will spread out some, but should not cover the tissue paper or even all the open spots. Once you are finished, put it some place to dry flat.
Once the leading is dry, you can put it in your window.


